About Metrology
The Science of Measurement
"Metrology" is the science of measurement. That's a pretty big statement, if you think about it. One can measure all sort of things, like weight, volume, fluid flow, pressure, sound, electrical signals, and so on. But we specialize in the measurement of physical dimensions which will reveal such things as shape, configuration, and the positioning of components relative to each other. Our specialty, in fact, is Large Volume Portable Metrology. This is a very specific (and fun) area of metrology where we measure things that are too big to move into a calibration laboratory for measurement (like an airplane wing, a particle accelerator, a rocket fuselage, or a turbine installed in a hydroelectric dam). However, these things often require very accurate, low tolerance measurements. So, our area of specialty is helping industry measure very big things to very small tolerances – when those things are too difficult to move.
Brunson serves two related but distinct areas of metrology – 3D Measurement and Alignment. Let's take a quick look at these two areas. The purpose of both is to aid in the construction, inspection, and maintenance of fairly large structures. Most challenges in industrial metrology can be separated into one of these two areas. And as you might expect, there are also a few places where they overlap.
3D Measurement
3D measurement, at least in the world of large volume, portable industrial metrology, involves characterizing an object's surface or other specific features for the purpose of analyzing its shape or position in 3-dimensional space, by capturing an array of 3-dimensional data points that define that object. This means, of course, that we convert an object's physical attributes into x, y, and z data points using some sort of measurement device. These x,y,z data points can represent all sorts of things in the real world. Perhaps there are a few points, representing hole locations – or perhaps there is an entire cloud of points, representing a complex geometric surface.
Taking physical 3D measurements has been made much simpler over the last number of years by the development of technologies such as tracking lasers, laser scanners, light radar, coordinate measurement "arms", indoor GPS, photogrammetry, and many others. The software-aided instruments which employ these technologies are capable of gathering 3D data points, sometimes numbering in the thousands or millions, and performing sophisticated analyses with the data they collect.
Here are some real-life examples of 3D measurement problems:
- You have a robot which is going to weld a product together for you. You need to program its moves to a number of exact locations which the product designers have given you, and verify that it actually moves to those given positions.
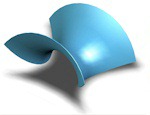
- You build a satellite dish antenna, which is supposed to be parabolic in shape. Now that it's done, you need to know how close to a true paraboloid it really is.
- You are building an aircraft wing with unique compound curves on the surface, as well as various attachment points for engine mounts, flaps, and connections to the fuselage. You need to know whether the curves are "as designed", and match the CAD design files. You also need to know whether all of the attachment points are in the right place.
- You have an irregularly-shaped fixture which was designed to hold a product and provide reference points for measurements during building and inspecting operations. You need to verify that those reference points are in the right place. Better yet, you'd like to get rid of the fixture and build the part without an expensive, physical fixture at all, by "remotely" checking out the location of all of the important features on your product.
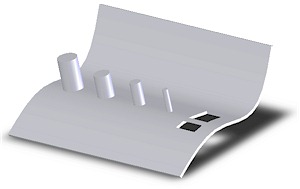
3D measurement instruments and techniques are often the only option when dealing with the myriad of objects having arbitrary shapes and features.
Industry encounters virtually thousands of problems similar to these every day. But they are all solved in the same manner – by identifying the unique measurement requirements, applying the correct measurement technology, and analyzing the resulting data.
3D measurement technologies are capable of capturing thousands of data points, all in three dimensions, which are then used to characterize curved the surfaces, planes, axes, or points in space that are important – regardless of orientation. Software is then used to extract the desired answers, relating the captured 3D data "clouds" to CAD models or other known requirements, comparing the parameters of mating components even though they are nowhere close to each other, helping to determine as-build object parameters (reverse engineering), and so on.
So we can see that measurement is all about capturing 3-dimensional data points, often in large numbers, often on oddly shaped or curved objects, and then analyzing those data points with software to learn answers about the object's size, position, orientation, or shape.
Alignment
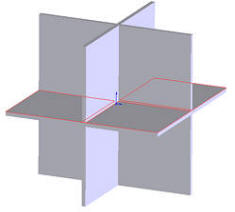
Alignment involves the evaluation of the geometric orientation of various components of a system by capturing 1- or 2-dimensional data points related to the positions of those components.
Here are some real-life examples of alignment problems:
- A long drive shaft is supported by a number of bearing journals. The shaft is being replaced and you need to know if all of the bearing points are in a precisely straight line.
- You have a printing press with a number of rolls, all of which are supposed to be parallel. The closer they are to parallel, the faster you can run your machine and the more accurate is the print registration. You need to evaluate if the rolls are out of parallel and by how much.
- You have a long bore and you want to know if it's straight all the way down the inside.
- You want to know if the ways of a lathe are straight, whether the spindle turns true, and whether the axis of the spindle is parallel to the ways or not.
Alignment instruments and techniques are often the best answer when component position must be evaluated with respect to straight lines and planes.
These alignment problems are more suited to the application of optical tooling equipment. This includes instruments such as transits, levels, alignment telescopes, and theodolites, as well as dozens of accessories designed to allow control over each instrument's position and to provide feedback regarding the orientation and location of the object in question. The measuring principles in alignment relate to the creation and control of an orthogonal measuring space. Optical tooling instruments are optimized to make this an easy task, what with their built-in capabilities for collimation, turning right angles, and evaluating deviations in 2 dimensions from an absolutely straight line.
One of the important distinctions between 3D measurement and alignment is that all of the measurements taken with optical tooling are 1- or 2-dimensional. In addition, and they are virtually always taken relative to some benchmark reference and not as an absolute measurement. The geometric principles which are used to construct the measuring space are simple and easy to understand, and thereby very flexible. That is, it is easy to use the same set of equipment to do a number of different types of alignment jobs.
So we can see that alignment is all about taking 1- or 2-dimensional, relative measurements, not 3D data points, and then analyzing those measurements to evaluate the relationship of various components with respect to the geometric constructs of squareness, flatness, level, straightness, parallelism, and plumb.
Learn more about optical tooling
Brunson's Role in Metrology
 To recap (and perhaps oversimplify), 3D measurement is the process you would use to determine how the shape, size, and features of various apples compare to any one desirable or standard apple. Alignment is the process you would use to find out if all of the apples are in a straight line. Of course, there is a certain amount of overlap between these two methodologies – there are times when real-life problems may be approached from either direction with very satisfactory results. Brunson plays a role in both of these metrology processes.
We manufacture a number of products to make 3D measurement easier and more accurate, including a wide variety of instrument stands, targets, target holders, scale bars, calibration artifacts, private-labeled OEM products, and custom-designed products for specific customer applications. These products are designed to work with laser scanners, trackers, photogrammetric instruments, coordinate measurement "arms", and the many other 3D instruments available.
And for those on the alignment side, we manufacture and sell an entire alignment solution consisting of Optical Tooling equipment and accessories, training, and field services designed to make your alignment jobs easier and more accurate.
That's why we can say we are... "Helping the World Measure"


